Seat Attached

Last week I went to West Marine and picked up a 6 inch hatch, a set of bolts to secure it, some small black plastic brackets, and two sizes (1/8 and 3/16 inch) of stretch cords.
They didn't have a hatch that opened with just a quarter turn, but the one I picked up takes only a single turn to seal. That is good enough for my purposes. I chose a transparent one so that it would be easier to check the contents with the hatch in place.
To secure it I chose some #8 stainless machine bolts and nylok nuts rather than wood screws. Wood screws would have been sharp, potentially painful and not as strong in the long run going through 4mm wood and glass.
I took the last remaining large piece of 6 oz cloth and draped it over the seat back structure, stretching from the top of the seat structure, down the seat back and forward over the seat bottom. There was a little bit of excess cloth to be trimmed, but the fragment was just about the perfect size and shape. A couple of additional pieces were cut to cover other strategic areas on the top, sides and front interior where the foam would reinforce the grab tube.
Sunday, after completing editing of the photos from the Lake Whatcom Classic race, I traced out the hole in the right rear panel of the seat back not far from the top of the seat and slightly closer to the front edge of the panel. This would also allow me to access the interior compartment for filleting and glassing the inside joints, or at least that was the plan.
The next step was to glue the seat back to the deck.


First, I mixed up several heaping spoonfuls of seam fillet. This finished off the first container of reddish goo (the green hardener having been used up previously) and started into the second container of green hardener. Once mixed thoroughly it was applied to the foam pieces that would be in contact with the wood and the grab tube. Once each piece was completed it was pressed into place in the frame.
I flipped the back over and carefully put it in place on the deck.
Fillet material was placed in the seams around the base of the seat back, filling the gaps and filleting the inside bottom seams. The gaps around the grab tube were filled, rounded and smoothed.
The two beveled wood pieces I had cut previously to fillet the outside rear panels at the deck were also put in place with fillet material filling the gaps.
I glassed the 6 oz cloth on the seat, and taped the outside seams on the sides with 6 oz cloth.
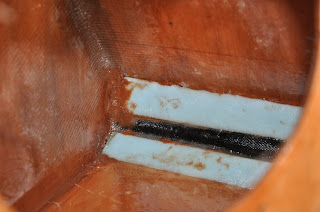
I had a plan of soaking with resin 12 oz biaxial cloth first, and then applying it to the foam and grab tube inside the seat back compartment. Well, the cloth was nicely soaked, but when it came to applying it to the grab tube it failed miserably. The resin soaked fabric would not stick to the wood and foam; rather, it stuck to the rubber gloves. I tried again and again, until the cloth was nothing but a crumpled mess and could not be salvaged.
Grrr!

I tried again with a smaller piece of dry 6 oz cloth. That worked much better, and I was able to apply enough resin to wet it out. Another try with some additional cloth worked to cover some of the area, but my last attempt with some heavier cloth failed, unfortunately.
Oh, well. Perhaps I'll try again later this week, or maybe just leave it as is, and apply some heavier cloth on the grab tubes and run it partially down the sides of the hull for strength.
On the topic of the propeller hub: I sent a drawing to a local machine shop that claimed to charge $80 per hour. Well, they quoted a price of $175 each for machining 3 hubs.
Methinks I will pursue other options.

1 Comments:
Hi Mike, great blog. For your hub machining try posting to this yahoo group. There's lot's of local machinists that will do it for alot less: seattle_metalheads@yahoogroups.com
-mark
Post a Comment
<< Home