Torque Box Assembled
A couple of days went by and I decided to double check the measurements between where the output of the gearbox would be and where the propeller shaft would emerge from the stuffing box. Sure enough, though the gearbox output was parallel to the prop shaft it was about 3/16 inch too high. The sides of the torque box would need to be cut down a quarter inch to compensate. Back to the bandsaw!

Once the sides were cut I reassembled the torque box and placed weights on the top panel to try to bend it into the flattened S-shape. That seemed to work, though there was still a small gap at the lower curve. That should disappear if the weights are left in place for a couple of days.
Rick suggested reinforcing the area around the bottom of the hull where the fiberglass stuffing box exited the hull. Given that his hulls were glass and foam, and that this hull was plywood, it seemed to be adequate to add a second layer of plywood around the hole, some fillet material to fill the gaps and a layer of 12 oz cloth strips to cover the edges and the emerging stuffing box.

I thought of using the original plywood panel from the torque box as it had a hole ready made. Unfortunately, however, the hole was much too long as it was intended to intersect the stuffing box at a shallower angle. Still, the panel width was fine so I cut off the section with the hole and trimmed the remainder into a roughly 1 foot long tear drop oval.
A 1-inch hole saw was used to drill a hole near one end. The rest of the hole was rough cut with a coping saw and finished with a rasp. A couple of minutes on the belt sander shaped the outer edges with a 1/2 to 3/4 inch bevel.
I double checked the wood fillet pieces I previously cut to make sure they fit properly. The horizontal pieces were OK, but the two vertical pieces needed sanding to make a decent joint at their base and to taper nicely at the top.
Small drain holes were filed in the bottoms of the foam bulkheads in the torque box and below the seat. I don't want water to be trapped anywhere!
On Saturday I was ready to start gluing.
Several strips of 12 oz and 6 ounce glass were cut. The 12 oz glass was for the stuffing box. The 6 oz glass was for reinforcing the fore deck where it joined the hull.
A small cup of fillet material was mixed. This I applied to the gaps between the deck and the hull, to the depressions in the central fore deck joint, and to various gaps between other previously glued panels. A bunch was stuffed into the stern hull joint using a chop stick. This was intended to both strengthen the joint as well as to help reduce the chance of leaking after impact.

A cup of resin was mixed. The first area to which it was applied was the reinforcement plywood for the stuffing box hull entry and then to the inside of the hull where that piece was to go. I then inserted the stuffing box through the reinforcement piece and the hull to the proper depth, letting it hang unsupported at the long end. After adjusting the position of the reinforcement plywood I liberally applied the fillet material in the gaps and around the base of the stuffing box. The 12 oz cloth was applied around the stuffing box and the beveled edges of the reinforcement piece. A lot of resin was used to wet out the cloth.
Weights were applied to the reinforcement piece to get it to mate flush with the hull and to counter to torque of the unsupported stuffing box.
Later on, when the boat is flipped over to glass its bottom, the stuffing box will be filleted and glassed from the bottom side as well. Not today, though!

More resin was mixed and applied to the portion of the cockpit deck that would soon be gone from view. It was then applied to the inside surface and the top and bottom edges of the torque box side panels and the sides and bottoms of the foam bulkheads.
The side panels and foam bulkheads were then positioned in the cockpit area, making sure that forward edges were flush against the wooden bulkhead and centered.
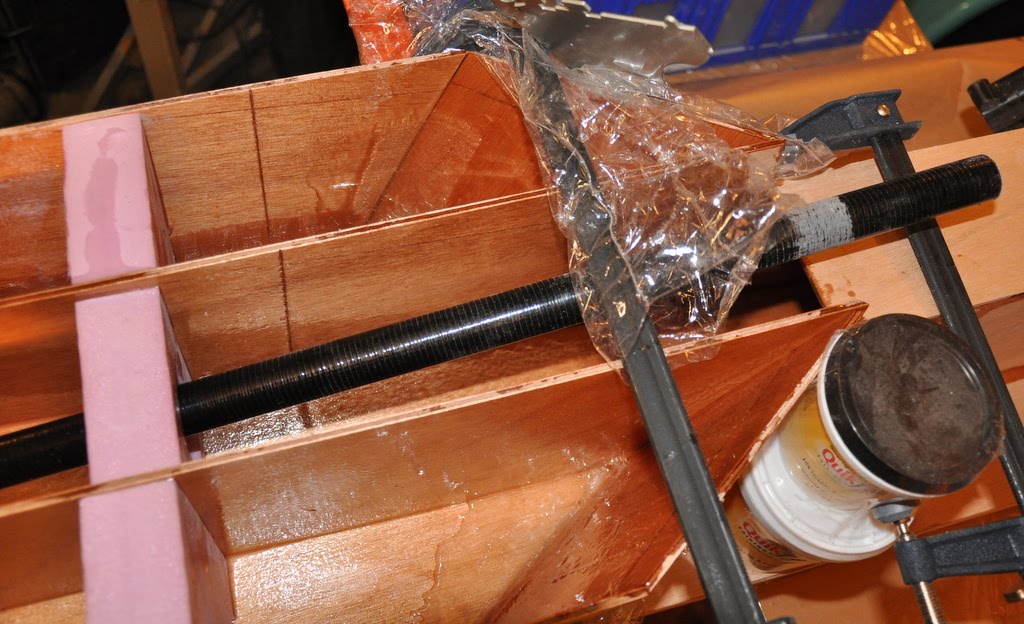
The top panel of the torque box was next. Resin was applied to the two ends and to the bottom. Resin was also applied to the slanting foam piece that would sit below the gear box.
The top panel was then placed on top of the torque box, with the tabs of the aft end inserted between the two sides. Weight was applied here first, then to the middle section and finally to the forward end.
A clamp was applied at the top sides where the forward foam bulkhead supported the slanting foam piece.

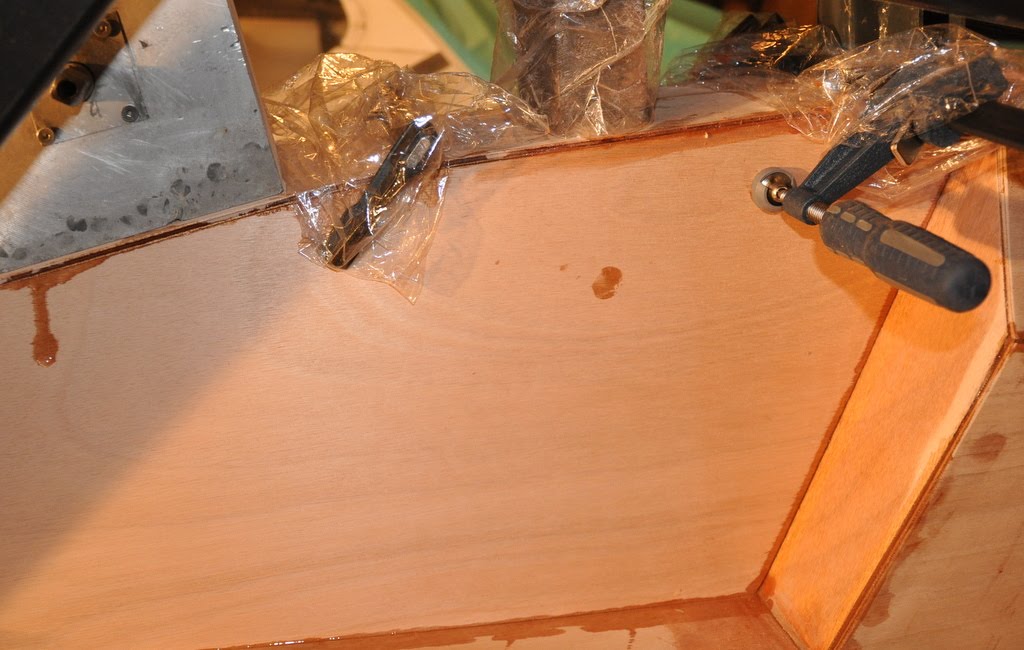
Resin and foam were next applied to the deck/hull joint, and 6 oz glass strips applied to either side. Shrink wrap plastic and a spring clamp were used to flatten and secure the glass at the bow. Additional plastic was used to try to work out any air gaps between the resin impregnated cloth and the wood.
The last pieces to be glued in place were the two diamond shaped pieces that fit on either side of the torque box below the front seat. Resin was applied to the interior surface and the bottom and side edges only. After propping the pieces in place small strips of 6 oz glass were applied to the inside bottom joint and the interior hull joint. I'm not sure how much force will be applied to these pieces, but I plan to apply glass to the outer side and top joints later on.
A couple of hours later I went back to take a look to see how things were progressing. I was unhappy to see that some gaps had appeared at the top end of the "S" of the torque box top panel. Apparently not enough weight had been applied there.
I mixed a small batch of fillet material and removed the weight from that section, which caused it to start separating from the panels. Fillet material was liberally applied to the joint edges. Weights were then placed on this section, with double the amount previously applied. Excess fillet material was removed with a paper towel.
We'll see how this turns out tomorrow!
posted by Michael Lampi @ 10:59 PM
0 comments
![]()

0 Comments:
Post a Comment
<< Home