New Gearing
The results from examining the 2:1 gearbox after it was returned to the factory showed that the shaft sheared. This was due to an apparent overstress of the output shaft.
Mitrpak was very accommodating in getting this swapped out for 1:1 gearbox internals and returning the updated gearbox to me. I highly recommend these folks for anyone needing a gearbox!
So, now I was back to a 1:1 gearbox and a need to reach a 6:1 ration between the prop shaft and the pedal cranks.
Matt suggested I try getting an 84 tooth chainring sprocket from a manufacturer he purchased his from. I sent the guy an e-mail, but he couldn't be bothered to respond. Matt also tried to reach him but he had no success, either.
I thought about the Cadence 125t #25 chainring sprocket, but they are currently out of stock with a lead time of about a month or so. I would also have to either get one of the 3/8 inch shaft 1:1 gearboxes to match the small #25 sprocket or somehow bore a 1/2 inch hole in the ones that are in stock. Given the troubles I had getting them bored to 3/8 inch without a wobble I figured that would not be a good solution, either.
So, what to do?
Looking through the sprocket selections available for go-karts, where one can get sprockets for #35 chain all the way from 10 teeth up to 90 teeth, I decided to try that route. 1/2 inch bore keyed sprockets are relatively cheap, even from McGuire Bearing ($16 each). An anodized aluminum 72 tooth split sprocket was another $16 or so (delivered) from a go-kart supplier in California that was on eBay. 10 feet of #35 chain cost about $20 from McGuire Bearing, though it turned out the "rollers" were not actually rollers. They were fixed just like #25 chain. Perhaps another source (like the go-kart supplier) might have true roller chain.

Anyway, with a 12 tooth small sprocket and a 72 tooth large sprocket I now have a 6:1 ratio. Yay!
Well, almost. The large sprocket was a split style, designed for easy assembly with a special mount. Bike cranks don't have this sort of mount. So, off to the garage for a bit of metal working.
The inner diameter of the large sprocket was just slightly smaller than the diameter of the crank spider. Five notches would need to be cut into the sprocket to accommodate the spider, or the sprocket would need to be mounted outboard of a mounting ring bolted to the spider. I chose to notch the sprocket so it could be mounted over the center of the spider, though in hindsight it might have been just fine the other way. I wanted to have the greatest flexibility in positioning it since #35 chain is rather wide and a bit heavier than bicycle chain.
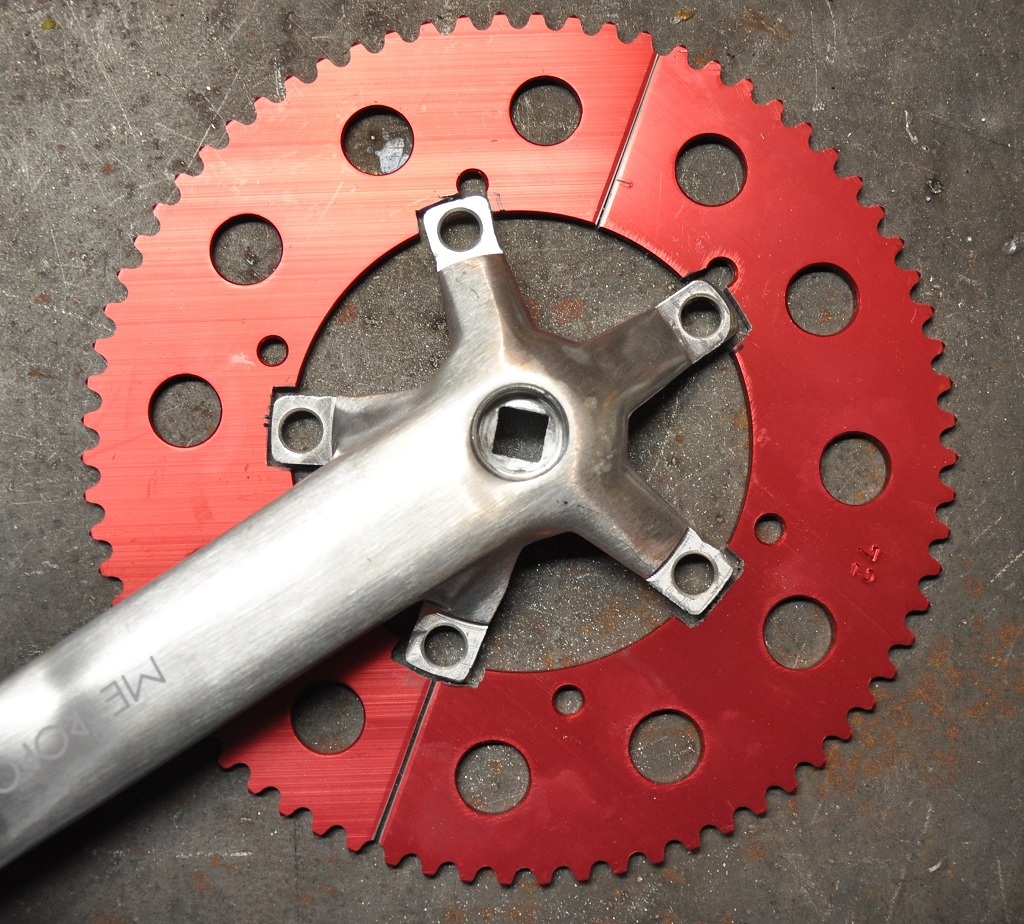

The notches were cut with a band saw, and cleaned up with a small file.
The next step was to mark the mounting ring (a 42 tooth bicycle sprocket) where the mounting holes were to be drilled, and use a die punch to help the drilling process. I ended up with 14 holes distributed around the mounting ring.
In drilling the holes I first drilled the mounting ring. Once all the holes were drilled I carefully centered it on top of the split ring an drilled the first hole through the both of the sprockets. A bolt was pushed through the hole to ensure that subsequent holes drilled were aligned as well.
After all the holes were drilled I went back and countersunk the holes on the #35 sprocket opposite the side where the mounting ring was to be located. Doing this allowed me to use screws that would fit flush.


The end result was nearly perfect. I found that there was a tiny separation between the two sprocket halves that prevented the chain from seating properly when it crossed over, but loosening and tightening the mounting ring bolts solved that.
Once the sprocket was completed and mounted on the crank arm I started work on the chain. It appeared that the boat would need about 45 inches of chain, which was just about perfect; i.e., no idler would be needed. I used a standard bicycle chain tool to break the #35 chain, and a bench vise to push the rivet back almost into place. The chain tool completed the job with no problems.


Tada! Now I have a working boat again!
posted by Michael Lampi @ 8:09 PM
4 comments
![]()

4 Comments:
Mike , long time follower of your blog as well as Rick and Ian. I am going to try and build my drive unit now, but am unsure where to purchase the spring steel. Rick mentions that 1/4 may be too small. I assume you are using a 1:1 mitrpak transmission. I plan to use a side mount like you show. Could you contact me?
Tom Williams
Jacksonville, Fl
ibiubu99@gmail.com
Hi Mike, same goes for me as longtime follower of pedal powered boats including Ricks'. I did briefly talk with you at the SR Budd Inlet race in 2011 (I'm in Olympia). I'm outfitting my kayak for pedal and like a list of where you got your parts if you don't mind...pillow blocks & pedal shaft, spring steel shaft and universal coupler. I've contacted Rick for a prop design.
Mark Anderson
windsurfn@comcast.net
I used VXB.com as the source of the pillow block bearings. The spring steel is from a company that sells it as sewer rod. There are several suppliers on the net. The one I used charged something like $20 for a 6 foot length of 5/16" diameter rod.
I don't have a universal coupler; rather, I took a cylinder of solid aluminum and drilled it to match the shafts, and drilled and tapped it for 1/4-20 setscrews.
Rick was the source of the crank axle with the drilled, tapped and tapered ends.
Yes, I am using a 1:1 Mitrpak right angle gearbox with 1/2 inch shafts.
Post a Comment
<< Home